Saudações gente da Terra!
Hoje trouxe mais uma parte da blusa pastel goth(finalmente!). Para quem ainda não viu é esse tutorial:
http://karurakim.blogspot.com.br/2013/08/wip-tutorial-blusa-pastel-goth-pastel.html
Salutes people of Earth!
Today brought a continuation of pastel blouse goth (finally!). For those who have not seen is this tutorial:
http://karurakim.blogspot.com.br/2013/08/wip-tutorial-blusa-pastel-goth-pastel.html
Trouxe o DIY da paste de traz do casaco. Vejam como ficou:
Brought the result from the back of the hoodie. See how it went:
Sorry pelas fotos de baixa qualidade!
Materiais
Tinta metálica dourada
Tinta relevo para tecido dourada
Pincéis
Materials
Golden metallic ink
Golden fabric paint
Brushes
O processo é o mesmo da frente, mas resolvi variar e fiz a cruz maior com a tinta relevo(para ficar em relevo basta passar o ferro quente do avesso) e as menores com a tinta metalizada.
E pronto!! Um blusão personalizado para você!
E para quem não conseguiu ou não gosta de fazer eu aceito encomendas de estilização/personalização de peças!!!
The process is the same from the front, but I decided to change the cross and made larger with the paint relief (to stay in relief just pass the hot iron inside out) and smaller with metallic ink.
And voila! A sweater customized for you!
And for those who could not or did not like to do i accept orders styling / customizing parts!! Bye!!
Hi! I'm Karura. I'm a brazilian designer. I'm just a girl who likes to make stuff and be creative! Here is to share with you, guys, tips on cosplay and harajuku fashion.
Mostrando postagens com marcador Estilização. Mostrar todas as postagens
domingo, 13 de outubro de 2013
Tutorial: Hoodie Pastel Goth
Marcadores:
Alternative Fashion,
DIY,
Estilização,
Fairy Kei,
Fashion,
Harajuku Fashion,
Hoodie,
Mahou Kei,
Moda Alternativa,
Outfits,
Pastel Goth,
Tutorial
terça-feira, 24 de setembro de 2013
W.I.P. Creamy Mami Hoodie
Oi gente!!
Estes últimos dias tem sidos corridos para mim devido a faculdade(não vejo a hora de formar) e a minha loja, cuidando da criação de novas peças e manutenção do site(estou fazendo umas mudanças no layout do blog também XD).
Mas sempre que tenho um tempinho, aproveito para dar andamento nos meus projetos e estilizar alguma peça e trouxe o andamento de uma em especial hoje: o Hoodie da Creamy Mami!
Hi Guys!
These last few days have solids busy for me due to college (I can not wait to graduate) and my store, taking care of creating new pieces and site maintenance (I'm making some changes in the layout of the blog as well XD).
But whenever I have some time, take the opportunity to make progress in my projects and stylize some piece and brought the progress in a special today: Creamy Mami Hoodie!
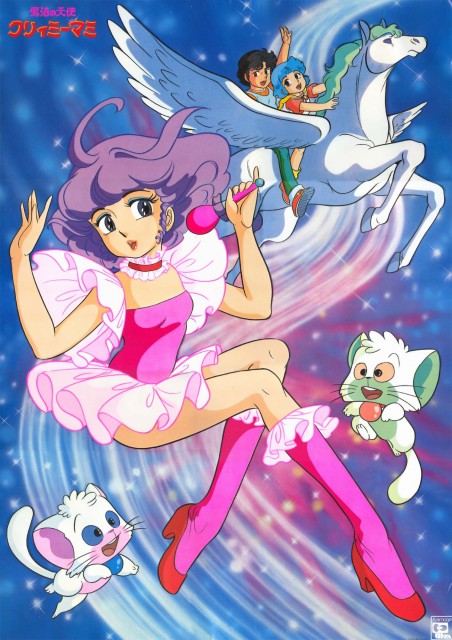
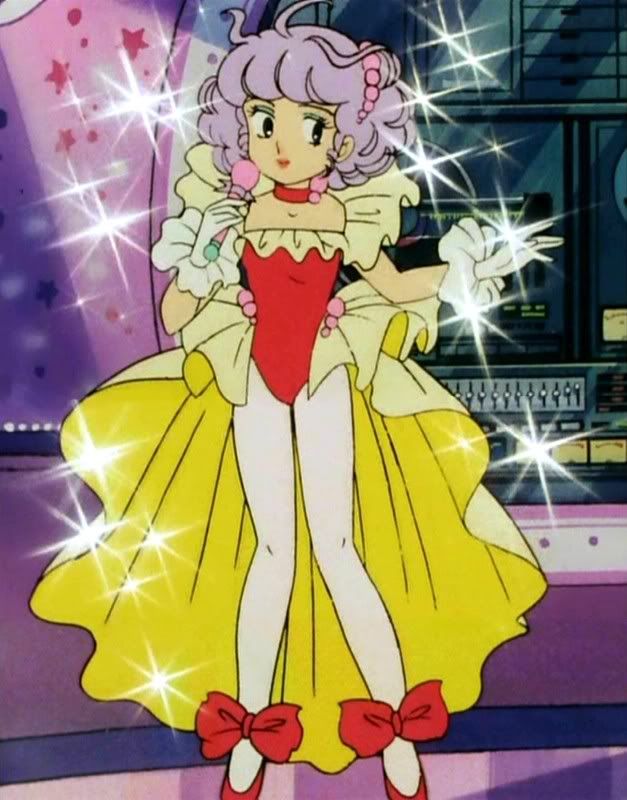
Creamy Mami é um desenho anime dos anos 80 sobre a Yū Morisawa uma menina de 10 anos comum, até que ela vê uma nave espacial flutuando no céu. Carregada para a nave, ela ajuda Pino Pino encontrar a Feather Star. Em agradecimento por sua ajuda, ele concede-lhe uma varinha mágica, o que lhe permite se transformar em uma menina de 16 anos de idade, durante um ano. A ela também é dada dois gatos de Feather Star, Posi e Nega, que vão cuidar dela enquanto ela tem poderes mágicos. Enquanto caminhava ao redor da cidade como uma adolescente, ela acidentalmente acaba aparecendo na TV e pedem para ela cantar, pois a magia lhe permite fazer muito bem. Usando o pseudônimo de Creamy Mami, ela torna-se um sucesso imediato, e logo começa uma carreira profissional como um ídolo sob Parthenon Productions. Ao longo do caminho, ela também atende moradores do passado de Feather Star e seres sobrenaturais. Além disso, ela deve lutar contra a Serpente Joe, um personagem sombrio dos Productions LP rivais, que está sempre tentando roubá la e Megumi-chan, outra das principais estrelas Parthenon Produções.
>>Info Wikipedia
Creamy Mami is a anime from the 80s about Yū Morisawa one ordinary 10-year-old girl, until she sees a spaceship floating in the sky. Carried into the ship, she helps Pino Pino find the Feather Star. In thanks for her assistance he grants her a magical wand, which allows her
to transform into a 16-year old girl, for one year. She is also given two cats from
Feather Star, Posi and Nega, who are to watch over her while she
has magical powers. While wandering around the city as a teenager, she accidentally ends up on TV and asked to sing, which the magic enables her to do remarkably
well. Using the alias of Creamy Mami, she becomes an overnight
success, and is soon sought to begin a professional career as
an idol under Parthenon Productions. Along the way, she also meets past residents of
Feather Star and supernatural beings. In addition, she must fight against Snake Joe,
a shady character of the rival LP Productions, who is always trying to steal
her away and Megumi-chan, another one of Parthenon Productions' top stars.
>> Wikipedia Info
Lindinha não é?! *-* Vamos ao moletom então! Como vocês podem ver na foto eu peguei uma imagem da Mami e fui desenhando no moletom com o lápis branco aquarelado. Com uma tinta relevo 3D eu já fiz o contorno de todo o desenho e preenchi algumas partes com tinta para tecido. Vou dar mais um acabamento e depois só enfeitar ele e pronto! Photoshoot Time!!
Pretty, hum?! Let the hoodie then! As you can see in the photo I took a picture of Mami and I was drawing in hoodie white pencil tinted. With an ink 3D relief I've done the outline of the whole design and filled some parts with fabric paint. I'll take another finish and then just decorate it and voila! Time for pictures!
Eu gosto muito de moletons em outfits(já tinha comentado neste post aqui). Super combina com anos 80 e fairy kei, mahou kei. Daqui a pouco tenho uma coleção bem grande deles!
Próximo post vem com mais novidades e um tutorial bem bacaninha!!
I really like hoodies in outfits (already commented in this post here). Super combines with 80s, fairy kei and mahou kei. In a little while I have a pretty big collection of them!
Next post comes with more news and tutorial!!
That's all folks!!
Marcadores:
80s,
Alternative,
Alternative Fashion,
Creamy Mami,
Estilização,
Fairy Kei,
Fashion,
Harajuku Fashion,
Hoodie,
Mahou Kei,
Mami,
Moda Alternativa,
W.I.P.
terça-feira, 27 de agosto de 2013
W.I.P. Tutorial: Blusa Pastel Goth / Pastel Goth Shirt
Oi bonitos, como vão? Esta semana minhas férias da faculdade acabaram. Muito triste, não deu nem para descansar, nem para fazer tudo o que queria. Mas fazer o quê?! Chega de minhas lamurias e vamos ao que interessa.
Hi beautiful, how are you? This week my vacation from college ended. Very sad, has given neither to rest nor to do everything I wanted. But do what?! Enough of my whimpers and let's go.
Aproveitei o último final de semana de férias para pintar umas roupas que estavam aqui em casa a um tempão. Comprei peças para o fairy kei e o pastel goth. Foram beemmm baratinhas e com um toque ficaram ótimas! E hoje trouxe um tutorial de como reformei uma dessas peças!!
I took the last weekend vacation to paint some clothes that were here at home for a long time. I bought pieces for fairy kei and the pastel goth. Were very cheap and looked great with a touch! And today brought a tutorial on how retired one of these pieces!!
Um modelo de peça que gosto muito é o blusão. Esses moletons básicos de frio. São tão confortáveis! Tenho em várias cores, tanto para outfits como para o dia a dia(coordeno algumas peças para o dia a dia). Acho ele bem curinga, serve para fairy kei em tons pastéis com desenhos coloridos e para pastel goth com uns detalhes puxados para o lado goth da vida.
A part model that I really like is the sweater. These basic cold sweats. They are so comfortable! I have in several colors for both outfits as for day to day (cordeno some pieces for day to day). I think it well wildcard serves to fairy kei pastel with colored drawings and pastel goth with a detail pulled to the side of goth life.
Trouxe um tutorial de como pintei esse blusão para o estilo pastel goth. Foi algo bem simples mesmo, mas que fez toda a diferença. E fiz um detalhe atrás que serve tanto para um outfit mais punk e que combina com meu dia a dia.
Espero que gostem!!!
Brought a tutorial on how I painted this sweater for style pastel goth. It was something very simple, but it made all the difference. And I did a detail behind that serves both for more punk outfit that blends with my day to day.
Hope you enjoy!!
Itens que serão necessários: pincéis de tamanhos variados(é indispensável um pincel fino para o contorno e detalhes), tintas(como o moletom era roxo usei tons pastéis de tinta, afinal tem que ter as duas coisas néh?, mas se a sua blusa for clarinha pode optar por cores mais fortes), água e um paninho para limpar os pincéis e a blusa claro!
Items you will need: brushes of varying sizes (a fine brush is essential to outline and detail), paint (like the color purple sweatshirt was used pastels ink, but if your blouse is pastel you can choose more colors strong), water and a cloth to clean the brushes and the blouse of course!
Eu escolhi uma cruz. Bem simples. Primeiramente faça um desenho com os contornos. Eu usei um lápis branco, mas você pode optar por giz, lápis comum, etc.
I chose a cross. Pretty simple. First draw a picture with the contours. I used a white pencil, but you can opt for chalk, pencil, etc..
Preencha o contorno completamente. Dependendo do tecido e da cor escolhida são necessárias mais camadas de tinta. Nessa blusa roxa, foram necessárias 4 camadas de verde mint. Deixe secar entre uma camada e outra para um melhor acabamento. Somente após essa parte completamente pronta, parta para os detalhes. Para ficar certinho faça o desenho primeiro e depois preencha como na cruz grande. E aplique a mesma quantidade de camadas de tinta.
Fill out the outline completely. Depending on the chosen color and fabric are required layers of ink. This purple blouse, it took 4 layers of green mint. Let dry between one layer and another for a better finish. Only after this part completely ready, depart for details. To be just right to make the design first and then fill in as large cross. And apply the same amount of ink layers.
E esse é o resultado!! Espero que tenham gostado. E se tentarem me mandem imagens!!
Eu sei que eu não mostrei nem falei do detalhe das costas. Ele vai ter um post/tutorial separado que posto ainda essa semana!!
And this is the result! I hope you enjoyed. And if they try to send me pictures!
I know I have not shown or talked back detail. He'll have a post / tutorial separate post later this week!
That's all folks!
sábado, 17 de agosto de 2013
Turorial: Como fazer ondas em perucas? How to make waves in wigs?
Olá!! Fazendo um post rapidinho para não deixar o blog parado!
Hello! Making a quick post to not let the blog stopped.
>> Como fazer ondas em uma peruca?
Existem vários métodos. Na peruca que vou usar no meu cosplay de Zatanna fiz de uma maneira bem simples que uso inclusive no meu cabelo, pois não agride tanto os fios e dá um resultado bacana.
>>How to make waves in a wig?
There are several methods. In Zatanna's wig I made a very simple way that I use even in my hair, because it does not damage the threads and gives a nice result.
Antes de tudo aplique e espalhe um pouco de cera modeladora pela peruca, a partir da altura de uns 10 cm do início dos fios. Junte todos os fios para trás e faça uma única trança baixa. Amarre e deixe por um tempo(deixei por um dia inteiro).
First of all apply and spread a little wax modeling the wig, from the height of about 10 cm from the beginning of the wires. Join all the wires back and make a single braid down. Tie and leave for a while (I left for a whole day).
Após isso use o secador por toda a extensão da trança. Faça isso por cerca de 10 min. Para um acabamento mais ondulado, passe a prancha sobre a trança, sempre de cima para baixo. Deixe por pelo menos um dia a peruca guardada no formato e pronto! Sua peruca ficará assim:
After this use the dryer throughout the length of the braid. Do this for about 10 min. To finish wavier, pass the board over the braid, always from top to bottom. Leave for at least a day kept the wig in shape and ready! Your wig will look like:
Dica: Dica: Para manter a peruca sempre com os cachos em ordem guarde-a com a trança. Isso vale para todas as perucas cacheadas. Guarde-as em formatos de trança. Se a sua peruca for muito cacheada, guarde-a em bobs de cabelo ou simplesmente enrolada com grampos de cabelo.
Tip: To keep the wig with curls always keep it in order to braid. This goes for all curled wigs. Save them in formats braid. If your wig is too curly, keep it in bobs hair or simply wrapped with hairpins.
Hello! Making a quick post to not let the blog stopped.
>> Como fazer ondas em uma peruca?
Existem vários métodos. Na peruca que vou usar no meu cosplay de Zatanna fiz de uma maneira bem simples que uso inclusive no meu cabelo, pois não agride tanto os fios e dá um resultado bacana.
>>How to make waves in a wig?
There are several methods. In Zatanna's wig I made a very simple way that I use even in my hair, because it does not damage the threads and gives a nice result.
Antes de tudo aplique e espalhe um pouco de cera modeladora pela peruca, a partir da altura de uns 10 cm do início dos fios. Junte todos os fios para trás e faça uma única trança baixa. Amarre e deixe por um tempo(deixei por um dia inteiro).
First of all apply and spread a little wax modeling the wig, from the height of about 10 cm from the beginning of the wires. Join all the wires back and make a single braid down. Tie and leave for a while (I left for a whole day).
Após isso use o secador por toda a extensão da trança. Faça isso por cerca de 10 min. Para um acabamento mais ondulado, passe a prancha sobre a trança, sempre de cima para baixo. Deixe por pelo menos um dia a peruca guardada no formato e pronto! Sua peruca ficará assim:
After this use the dryer throughout the length of the braid. Do this for about 10 min. To finish wavier, pass the board over the braid, always from top to bottom. Leave for at least a day kept the wig in shape and ready! Your wig will look like:
Dica: Dica: Para manter a peruca sempre com os cachos em ordem guarde-a com a trança. Isso vale para todas as perucas cacheadas. Guarde-as em formatos de trança. Se a sua peruca for muito cacheada, guarde-a em bobs de cabelo ou simplesmente enrolada com grampos de cabelo.
Tip: To keep the wig with curls always keep it in order to braid. This goes for all curled wigs. Save them in formats braid. If your wig is too curly, keep it in bobs hair or simply wrapped with hairpins.
That's all folks!
Assinar:
Postagens (Atom)